Latest Post
Tampilkan postingan dengan label software. Tampilkan semua postingan
Tampilkan postingan dengan label software. Tampilkan semua postingan
Shotcut keys pada Microsoft Word
Written By ThoLe on Jumat, 20 Agustus 2010 | 15.28

Saat ini saya memberikan kepada sahabat2 semua shotcut pada microsoft word. Tetapi jangan protes yaa kalau gak bisa dipakai, karena pada word 2007 atau word 2010 ada banyak shotcut yang tidak bisa dipakai.
Le's go carrying out !
Tombol Shortcut | Deskripsi |
Ctrl + A | Memilih semua isi halaman. |
Ctrl + B | Bold disorot seleksi. |
Ctrl + C | Copy teks yang dipilih. |
Ctrl + E | Aligns baris atau teks yang dipilih ke tengah layar. |
Ctrl + F | menemukan kotak untuk mencari dan merubah huruf atau kata |
Ctrl + I | Italic disorot seleksi. |
Ctrl + J | Aligns atau baris teks yang dipilih untuk membenarkan layar. |
Ctrl + K | Insert link |
Ctrl + L | Aligns baris atau teks yang dipilih ke kiri layar. |
Ctrl + M | Indentasi paragraf. |
Ctrl + P | Buka jendela cetak. |
Ctrl + R | Aligns baris atau teks yang dipilih di sebelah kanan layar. |
Ctrl + T | Buat indent menggantung. |
Ctrl + U | Underline disorot seleksi. |
Ctrl + V | Paste. |
Ctrl + X | Cut teks yang dipilih. |
Ctrl + Y | Kembalikan tindakan terakhir dilakukan. |
Ctrl + Z | Undo aksi terakhir. |
Ctrl + Shift + F | Mengubah font. |
Ctrl + Shift +> | Meningkatkan dipilih font poin 1 sampai dengan 12pt dan kemudian meningkat font 2 pts. |
Ctrl +] | Meningkatkan dipilih font 1 poin. |
Ctrl + Shift + < | Penurunan dipilih font-1pts jika 12pt atau lebih rendah, jika diatas 12 berkurang font oleh 2 pt. |
Ctrl + [ | Penurunan font-1pts dipilih. |
Ctrl + Shift + * | Lihat atau menyembunyikan karakter non cetak. |
Ctrl + | Bergerak satu kata ke kiri. |
Ctrl + Panah kanan | Bergerak satu kata ke kanan. |
Ctrl + | Bergerak ke awal baris atau paragraf. |
Ctrl + | Bergerak ke akhir paragraf. |
Ctrl + | Untuk menghapus kata di kanan kursor. |
Ctrl + Backspace | Menghapus kata ke kiri kursor. |
Ctrl + End | Memindahkan kursor ke akhir dokumen. |
Ctrl + Home | Memindahkan kursor ke awal dokumen. |
Ctrl + Spasi | Reset disorot teks ke default font. |
Ctrl + 1 | Single-ruang baris. |
Ctrl + 2 | Double-ruang baris. |
Ctrl + 5 | spasi 1,5-line. |
Ctrl + Alt + 1 | Perubahan teks ke pos 1. |
Ctrl + Alt + 2 | Perubahan teks ke pos 2. |
Ctrl + Alt + 3 | Perubahan teks ke pos 3. |
Ctrl + F1 | Buka Task Pane. |
F1 | Buka Help. |
Alt + Ctrl + F2 | Buka dokumen baru. |
Ctrl + F2 | Tampilan pratinjau cetak. |
Shift + F3 | Mengubah teks pada Microsoft Word dari atas ke huruf kecil atau huruf kapital pada awal setiap kata. |
Shift + Insert | Paste. |
F4 | Ulangi aksi terakhir dilakukan (Word 2000 +) |
F5 | Buka menemukan, mengganti, dan pergi ke jendela di Microsoft Word. |
Ctrl + Shift + F6 | Membuka dokumen lain buka Microsoft Word. |
F7 | Spell dan memeriksa tata bahasa yang dipilih teks dan / atau dokumen. |
Shift + F7 | Menjalankan cek Thesaurus pada kata yang disorot. |
F12 | Simpan sebagai. |
Shift + F12 | Simpan. |
Ctrl + Shift + F12 | Mencetak dokumen. |
Alt + Shift + D | Masukkan tanggal sekarang. |
Alt + Shift + T | Masukkan waktu saat ini. |
Mouse pintas Deskripsi
Klik, tahan, dan drag teks Memilih dari mana Anda klik dan tahan untuk titik Anda menarik dan melepaskan.
Klik dua kali klik dua kali Jika kata, memilih kata lengkap.
Double klik Double klik di sebelah kiri, tengah, atau kanan dari baris kosong akan membuat alignment teks kiri, tengah, atau kanan sejajar.
Double-klik dua kali mengklik di mana saja setelah teks pada baris akan menetapkan berhenti tab.
Triple-klik Memilih baris atau ayat dari teks triple-mouse diklik.
Ctrl + zooms roda Mouse masuk dan keluar dari dokumen.
sumber google
Tips Interface Photoshop
Written By ThoLe on Minggu, 15 Agustus 2010 | 14.31

Here ,some tips and tricks in photoshop tutorials.
1. You probably knew that pressing the Tab key hides the toolbar and palettes, but you can also press Shift+Tab to hide only the palettes (thereby leaving the toolbar visible).
2. Snap your palettes to the nearest screen edge by Shift-clicking on their titlebars.
3. Minimize palettes by double-clicking on their (names in the) palette tabs. Use the minimize button on the palette titlebars to cycle between: compact mode (minimum number of options /contents visible) and contents mode (view all palette options / contents).
4. Press Enter (or double-click on a tool icon in the toolbar) to reveal the Options palette for the currently active tool; alternatively, you may choose Window » Show Options from the menus to reveal the Options palette.
5. Use the Zoom field (in the bottom-left of the Photoshop window or Navigator palette) to quickly enter an exact zoom level; press Shift+Enter after entering a value to have the field remain active.
6. To change the (document size) information displayed in the status bar (bottom of the screen – Window » Show Status Bar), click on the > button and choose a new item from the pop-up menu. Click on the status bar (to the left of the > button) to display the Print Size of the current document. Alt-click to see the image dimensions and resolution. Ctrl-click for Tile information.
7. You can fill the (gray) canvas borders with the foreground color by Shift-clicking on it with the Paint Bucket tool [K]. Note: To replace the default color, change the foreground color to 25% gray (R192,G192,B192) and Shift-click on the canvas border again.
8. Hold down the Alt key to change any Cancel button into a Reset button (in any dialog box); this allows you to easily restore values without having to Cancel and come back.
9. Use the Caps Lock key to turn Precise Cursors on / off. Note: This does not work if Precise Cursors are already enabled in the Preferences [Ctrl+K, Ctrl+3] (File » Preferences » Display & Cursors...).
10. Press "F" to cycle between three different Full Screen modes (or use the Mode buttons near the bottom of the toolbar). Tip: Press Shift+F to toggle the menus in Full Screen mode.
11. Double-clicking on Photoshop's background (the gray background) will summon the Open command [Ctrl+O] (File » Open...).
12. Shift-click on the color ramp (on the Color palette [F6] (Window » Show Color)) to change the spectrum. Alternatively, you may either right-click on the color ramp or open the Color palette menu to select an alternate color mode.
13. Right-click on an image window's titlebar to quickly access features like Canvas Size, Image Size and Duplicate.
14. Pausing the mouse pointer over an image window's titlebar will reveal (via a tool tip) the full path of the current document.
15. Add a custom color to the Swatches palette (Window » Show Swatches) by clicking on any empty (gray) area. Remove a color by Ctrl-clicking on it. Replace a color by Shift-clicking on it. Insert a new swatch color (between two other colors) by Alt+Shift-clicking on either color.
16. Use the Hexadecimal Color Field ( # ) in the Color Picker to copy and paste color values from one place in Photoshop to another (or even to another application that supports Hexadecimal color values).
17. To increase / decrease the size of the Curves window [Ctrl+M] (Image » Adjust » Curves...),click on the maximize / minimize button.
Note: Clicking the maximize / minimize button toggles the Curves grid between 171 pixels and 256 pixels wide. For greater accuracy, use the larger grid, since you have control over all 256 shades of gray in the image (compared to 171 shades by using the small grid).
Tip: Alt-click on the Curves window to increase the grid size.
Tip: Hold down the Alt key to change Auto button into an Options button (and the Cancel button into a Reset button).
sumber google
PHOTOSHOP LAYER TIPS

1. You can cycle through layer blending modes by using Shift+Plus ( + ) (cycle forward) and Shift+Minus ( - ) (cycle backward). Also try Alt+Shift+Letter (where Letter is one of letters listed below) to quickly change the blending mode.
N = Normal
I = Dissolve
M = Multiply
S = Screen
O = Overlay
F = Soft Light
H = Hard Light
D = Color Dodge
B = Color Burn
K = Darken
G = Lighten
E = Difference
X = Exclusion
U = Hue
T = Saturation
C = Color
Y = Luminosity
Q = Behind 1
L = Threshold 2
R = Clear 3
W = Shadows 4
V = Midtones 4
Z = Highlights 4
Only applicable to: 1. Paint tools 2. Indexed mode 3. Dodge and Burn tools [O] 4. Line [N] and Bucket [K] tools on multi-layered images
Note: The above hotkeys also affect the blending mode of the currently active paint tool, so if you wish to change the blending mode of the active layer, be sure to switch to the Move tool [V] or one of the selection tools first.
2. Change the opacity of the currently active tool or layer by using the number keys (on the keyboard or on the number pad). Press "1" for 10% Opacity, "5" for 50%, and so on; use "0" for 100% Opacity. Numbers pressed in succession such as "85" will result in an opacity of 85%.
Note: The above hotkeys also affect the opacity of the currently active paint tool, so if you wish to change the opacity of the active layer, be sure to switch to the Move tool [V] or one of the selection tools first.
3. Increase / decrease slider bars by 1% using the left and right arrow keys. Add Shift to increase / decrease by 10% increments.
4. Hide / Reveal all layers by Alt-clicking on the visibility icon (the eyeball) of the desired layer.
5. Unlink all layers from the current layer by Alt-clicking on the current layer's paintbrush icon.
6. To clear (remove) all layer effects from a particular layer, hold the Alt key and double-click on the layer's effect icon ( f ); or from the menus, choose Layer » Effects » Clear Effects.
Tip: To disable an individual effect, hold down the Alt key and select it by name from the Layer » Effects submenu. Alternatively, you may uncheck its Apply flag in the effects dialog box.
7. Alt-click between layers (in the Layers palette) to group them together. This is handy when several layers are linked together, and you only want to group specific layers together (since Group [Ctrl+G] (Layer » Group with Previous) changes into Group Linked [Ctrl+G] (Layer » Group Linked) when the current layer is linked to other layers).
8. Here is a real time-saver for adding adjustment layers (Layer » New » Adjustment Layer...): simply Ctrl-click on the New Layer icon (at the bottom of the Layers palette) and select the type ofadjustment layer you wish to add!
9. Alt-click on the Trash icon (at the bottom of the Layers palette) to quickly delete layers (without confirmation); also works with channels and paths.
10. Instead of going to the Channels palette (Window » Show Channels) to edit a layer mask, simply Alt-click on the mask's thumbnail in the Layers palette [F7] (Window » Show Layers) to reveal it; Shift-click layer mask thumbnails to disable / enable them (a red X indicates a disabled mask). Alt+Shift-click a layer mask to view it in rubylith color (or press backslash [ \ ] ). Ctrl-click on a mask's thumbnail to load its Transparency Selection (or press Ctrl+Alt+ \ ).
Tip: Press Ctrl+ \ to switch the focus from the current layer (image) to its mask.
11. Click the Add Layer Mask button (at the bottom of the Layers palette [F7]) to add a mask which reveals the current selection (Layer » Add Layer Mask » Reveal All). Alt-click on the Add Layer Mask button to add a mask which hides the current selection (Layer » Add Layer Mask » Hide All).
12. Turn off all paths easily by clicking on the empty area of the Paths palette (under the path
layers).
sumber
PHOTOSHOP SELECTION TIPS

1. After editing a selection in Quick Mask mode, Alt-click the Standard mode (Quick Mask off) button to invert the current selection.
2. When using the Marquee tools [M], use the Shift key to create perfect circles or squares: use the Alt key to draw them from their center.
3. Use the Reselect command [Ctrl+Shift+D] (Select » Reselect) to load / restore your previous selection.
4. You may alternate between Polygonal and Freehand Lasso [L], while you are creating a selection, by holding down the Alt key.
5. Use the Space Bar to move a selection while drawing it.
6. Holding the Shift or Alt keys to add or subtract from a selection is fairly common knowledge, but did you know that you could hold down Shift and Alt together to intersect two selections?
Tip: Ctrl-click on a layer thumbnail (in the Layers palette - to load its transparency channel) and then Ctrl+Alt+Shift-click a second layer to intersect the two layers' transparency masks.
7. Retain your selections while scaling or duplicating an image by first switching to Quick Mask mode [Q] (or click on the Quick Mask icon near the bottom of the toolbar).
8. Alt-click the Quick Mask button to toggle between masked or selected areas.
sumber
Photoshop COMMAND TIPS

Notes: The above path assumes a default installation (for Windows).
To add your own HTML editor to ImageReady's "Jump to..." menu, create a shortcut to the desired application within the "Jump To HTML Editor" folder.
To include your preferred browser(s) in ImageReady's "Preview in..." menu, create a shortcut within the "Preview In" folder.
To assign the default graphics application for ImageReady's “Jump To” button [Ctrl+Shift+M], create a shortcut in the "Jump To Graphics Editor" folder. Place brackets “[ ]” around the name of the application - the brackets will not be displayed.
To assign the default graphics application for Photoshop's “Jump To” button [Ctrl+Shift+M], create a shortcut in the "Jump To Graphics Editor" folder. Place braces “{ }” around the name of the application - the braces will not be displayed.
1. To reapply the last filter, use Filter » Last Filter [Ctrl+F]. To reapply a filter with new settings, add the Alt key (Ctrl+Alt+F or Alt + Filter » Last Filter).
Tip: Fade the effects (and change the blending mode) of the last filter (or adjustment), by pressing Ctrl+Shift+F (Filter » Fade Filter…).
2. If you have recently copied an image to the Clipboard, Photoshop will automatically insert the dimensions of the Clipboard image when you create a New Document [Ctrl+N] (File » New...). To bypass this feature and recall the last settings, hold down the Alt key [Ctrl+Alt+N] (Alt + File » New...).
Tip: To insert the dimensions of any open document into the New Document window [Ctrl+N] (File » New...), choose its name from the bottom of the Window menu.
3. Use Ctrl+Alt+Z and Ctrl+Shift+Z to step backward and forward though the history states (or use the History palette menu to access the step commands); use these keys in conjunction with Undo [Ctrl+Z] (Edit » Undo) to cycle between a specific history state and the current state.
4. Use Alt+Backspace and Ctrl+Backspace to Fill (Edit » Fill...) with the foreground and background colors, respectively; also, use Shift+Backspace to open the Fill dialog box. Very useful!
Tip: Use Alt+Shift+Backspace and Ctrl+Shift+Backspace to fill only existing pixels (Preserve Transparency) with the foreground and background colors, respectively.
5. Perform a Free Transform [Ctrl+T] (Edit » Free Transform) on a duplicate (of the current selection) by holding down the Alt key (Ctrl+Alt+T or Alt + Edit » Free Transform).
Tip: Repeat the last Transformation by pressing Ctrl+Shift+T (Edit » Transform » Again). Repeat the last Transformation on a duplicate by pressing Ctrl+Alt+Shift+T (Alt + Edit » Transform » Again).
6. To stop the Crop tool [C] from snapping to the image borders, hold down the Ctrl key while you are dragging the crop handles.
7. To straighten a crooked image, use the Measure tool [U] to draw a line along what should be a horizontal or vertical line (the edge of the image, a doorframe, across the eyes of a person in a portrait, etc.), and then choose Image » Rotate Canvas » Arbitrary...; the correct Angle and Direction will appear, just hit OK.
Note: You can also use the Crop tool [C] to rotate and crop an image in one step. Select the Crop tool [C] and draw a rectangular region. Use the crop handle to scale the marquee, and drag outside the marquee to rotate it; hit Enter to crop the image.
Tip: The angle of the Measure tool [U] is also entered automatically into the Transform Numeric dialog box (Edit » Transform » Numeric).
sumber google
Windows Vista Top 10 Tips and Triks

1)..Explore the new Windows Vista start menu.
Looking for specific applications, Web sites, and e-mails is faster than ever with the streamlined Windows Vista start menu. To find a specific application or file, click the Windows key on the keyboard (or open the start menu)
and enter the file name in the Instant Search field. As you type, Windows Vista dynamically searches filenames, metadata, and the full text of all files and displays the choices by file type. For example, type “out” to find
Microsoft® Outlook®.
2)..Discover the new search explorer.
Try filtering by type using the search pane and selecting Documents. Next choose to see your files in another way, via the new stack view. Select the author column header control drop down menu, and choose the option to Stack by author. Explore all the documents by a particular author by double clicking on an author’s stack. Now, save that search as a new search folder. Choose the option Save Search found on the top command bar and name and save your search folder. In the future, to re-run it, simply select the Searches folder link on the left side navigation pane, and double click on your search
folder.
3)..Experience the enhanced user interface.
If your PC supports the Windows® Aero™ user experience, open multiple files and see how easy it is to locate the right open window using the breakthrough Windows Flip
(simply ALT+TAB) or Flip 3D (Windows key+TAB).
4)..Browse multiple Web sites.
Tabbed browsing in Internet Explorer® 7 enables a single Internet Explorer window to run with the convenience of multiple pages. Open a new page by clicking the empty
tab on the toolbar or by right-clicking any hyperlink and choosing New Tab. Tabs can also be right-clicked to refresh individual pages or refresh pages as a group. You
can close either individual tabs or an entire group, and you can save tabs as one favorite group. With the Quick Tabs feature, the icon just to the right of the Favorites icon, thumbnail images of all open tabs can be seen in a single view helping you manage multiple open tabs.
5)..Print picture perfect Web content.
Most Web sites are simply not formatted to fit cleanly on a standard piece of paper. With the new shrink to fit printing feature found in Internet Explorer 7 Web sites will no longer get cut off when sent to the printer.
6)..Collaborate with a co-worker.
Want an easy way to share files and applications with a colleague or customer—even when you may not be part of the same network? Windows Meeting Space is a new
experience in Windows Vista that enables you to start an impromptu collaboration session with other Windows Vista users. Simply open Windows Meeting Space and
start a session. Windows Vista will automatically detect other Windows Vista users that are on the same sub-net infrastructure or close enough for you to create an
ad hoc (direct PC-to-PC connection) wireless connection. Once you have invited them and they have accepted, you can share documents by simply dragging a document
to the Handouts area on the bottom right which instantly replicates that file across the other meeting participants’ machines. Dragging the file to the presentation area on the left side starts application sharing, enabling the other participants to watch as you present that file. If someone has a good edit for your file, you can make that edit in real time, or pass control of the application directly to that participant for them to make that edit for you.
7)..Share a folder or file directly from your PC.
Windows Vista improves on the Windows network folder sharing experience first introduced with Windows XP by giving you more flexibility in what you can share with other people and improving the setup process. With Windows Vista you can now share folders and individual files with any other user on the same corporate network. From any explorer, select a file or folder and on the command bar
choose the option to Share. Enter the name of another user on the same network, and give them appropriate rights of access—reader, co-owner, etc. To help close the
loop, Windows Vista can even automatically compose an e-mail to the individuals with which you have shared the content. The auto-generated e-mail contains a hyperlink
to the shared content, enabling the recipient to instantly be taken to the shared content.
8)..Create an XPS Document.
XPS documents are a new archiving format perfect for preserving content and for securely sharing information in an application independent way. To create an XPS
document, open any document in virtually any application, and select the print option. In the printer selection menu, choose Microsoft XPS Document Writer, and save the file. Double click on the file, which should open it in the
XPS Viewer, which is hosted by Internet Explorer 7. The XPS document is a pixel-perfect rendition of the original source material.
9)..Speed up your PC’s performance.
Windows Vista introduces a new concept for adding additional performance to a running system. Windows ReadyBoost™ lets people use flash memory on a USB
2.0 drive, SD Card, Compact Flash, or other memory form factor to provide additional memory cache—memory that the computer can access much more quickly than it can
access data on the hard drive. Insert a USB 2.0 memory drive with at least 512 MB capacity. When prompted, click use this device to speed up my computer.
10)..Recover a previous version of a document.
Windows Vista introduces a new feature: Previous Versions. This allows you to “roll back” the clock to an earlier version of a file that you may have accidentally
saved over or edited. In the Documents Explorer, open a document, edit it, save it, and then close it. While selecting the document, choose the Previous Versions option on the command bar, which will bring up a list of previously
saved versions of the individual file. Choose a previous version and Windows Vista will restore your file to that version. Careful: all edits since that version will be lost.
Original tips:microsoft.com
sumber
Deep Freeze instantly protects and preserves original computer configurations

Deep Freeze instantly protects and preserves original computer configurations, eliminating routine IT maintenance while allowing completely unrestricted workstation access. Regardless of the changes made to a workstation, simply restart to reset the computer to its original state. The result is a protected, parallel network, free of viruses and unwanted programs.
Download Deep Freeze
sumber
Restart Windows without restarting your computer
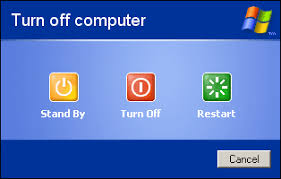
Small tip again, When you click on the SHUTDOWN button, make sure to simultaneous press SHIFT Button. If you hold the Shift key down while clicking on SHUTDOWN button, you computer would restart without restarting the Computer. This is equivalent to term"HOT REBOOT".
sumber
sumber


